BIOS Basics: How to Configure Your PC’s Firmware for First Use
If you bought a pre-built desktop PC, it’s a safe bet that the manufacturer optimized the basic input/output system (BIOS) settings for the hardware in the box—though it never hurts to check them out and “trust but verify.” But if you’ve built your own desktop PC (whether it's your first, or the latest in your life), or upgraded a key component, you'll want to get at least a little down and dirty with your BIOS. Indeed, you may have no choice.
Maybe the acronym “BIOS” is new to you, or you know what a BIOS is, but the many menus of a typical one intimidate you. Fear not—there are only a few places in the BIOS that most PC users ever need to tread. The BIOS chip is a hunk of silicon on your PC’s motherboard that stores the low-level settings for starting up and operating the hardware attached to your PC, code commonly referred to as “firmware.” New firmware versions can be overwritten to the chip, and BIOS contents are retained when the PC is powered off or unplugged with the help of a coin-cell battery on the motherboard. The firmware operates outside the operating system; at the simplest level, it's what tells your PC, as it boots, where to look for the drive with the OS to load, exactly how fast to run your RAM and CPU, and much more.
We should start with a bit more about the term "BIOS." These days, modern boards actually run an evolution of what many users think of the classic BIOS firmware, called Unified Extensible Firmware Interface (UEFI). UEFI is an update of recent years that removes some of the limitations of classic BIOSes, such as the ability to boot from multi-terabyte drives, and allows for graphical, clickable menus. We'll use the terms "BIOS" and "UEFI" interchangeably here, as BIOS is the generic, legacy term that most PC users know. But know that your system, if it's of the last few years, is probably running a form of UEFI. Indeed, some motherboard makers still call their UEFI-based firmware a BIOS, like MSI with its Click BIOS or Asus with its UEFI BIOS Utility.
A BIOS can contain dozens of sub-settings, often on an “Advanced mode” menu, with an “EZ mode” menu showing summaries of basic system info and giving you access to the most common BIOS chores. Overclockers and system tweakers are the folks who will dig into the esoteric BIOS submenus, and even then, they tend to mess with just a spoonful of the smorgasbord of options.
If you just built your own PC, or upgraded a key part such as the CPU or memory, it pays to revisit your BIOS to check on a few key settings, even if you’re indifferent to squeezing every last iota of performance out of your PC. Indeed, you may have to go BIOS-diving simply to make your PC recognize your Windows-installation flash USB or disc to install an OS.
Ready to gain some basic BIOS savvy? Let’s go through the four key items you should know how to handle in your PC’s BIOS, and how they might differ among board vendors. It’s impossible to factor in every BIOS variation from board to board and maker to maker. But our guide will get you ready to recognize the key stuff on any board BIOS.
1. How to Check Out and Change the Boot Order in Your BIOS/UEFI
Let’s say you have a new PC build, replete with a new, clean M.2 or 2.5-inch SSD, or a hard drive. And let’s say you have an empty drive and bootable installation media for the OS (say, a Windows 11 thumb drive). In that scenario, modern motherboard firmware should automatically detect that your drive is empty and attempt to boot from the installation media. But for various reasons, some of those things might not apply to your build, and you may have to do it the manual way.
Motherboards are, fortunately, programmed to use function keys to enter a boot drive selection menu: On modern boards, Asus uses F8, ASRock and MSI F11, and Gigabyte F12, any of which can be activated by a timely tap of that F-key on the firmware (BIOS) splash screen that appears at system startup before you can actually load the BIOS utility. Of course, you might want to designate your selection of boot drive to “stick,” and for that, you’ll want to instead use the keyboard’s Delete key to enter the BIOS itself and its graphical user interface (GUI).
First, a note on getting into your PC's BIOS in the first place. It can take a bit of practice, depending on the board. Shortly after powering on, and just as the first logo screen or RAM-enumeration countdown appears, you’ll want to tap Delete at measured intervals to launch into the system BIOS. (Some boards, especially older ones, may use other keys to launch into the BIOS, such as F8. The initial system splash screen may tell you which key or keys to whack to “enter setup.” That's what you want.)
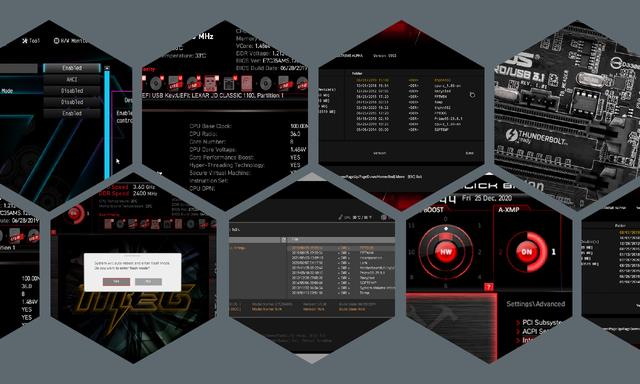
We’ve picked three motherboards to represent the breadth of what most users will experience in a modern BIOS. Two support AMD processors, and one supports Intel.
Our first two screenshots below show that in the default EZ mode BIOS interface, to change the boot order, Asus and ASRock have simple click-and-drag arrangements at the right side of the menu. Easy peasy.
MSI’s click-and-drag boot-priority menu, meanwhile, appears above the EZ Menu’s main section as little icons, and shows the two detected drives (highlighted in pink) along with several undetected boot devices. MSI’s strategy is both forward-looking and traditional, allowing users to boot from a portable drive if it’s connected later, or an installed drive when the portable drive isn’t connected.
Many other manufacturers have eliminated non-detected drives from the BIOS boot selection menu to make it easier to navigate. We just point that out to illustrate that different board makers’ BIOSes take different approaches to the angle of undetected drives.
As noted earlier, most manufacturers also offer an Advanced mode GUI with additional features, in addition to the EZ or EZ mode GUI. A keyboard hotkey toggles between these two interface styles, with Asus and MSI typically using the F7 function key and ASRock the F6. Asus’ and ASRock’s Advanced GUI boot menus are found under the Boot tab, and again are simplified to show only detected devices...

Meanwhile, MSI’s Advanced-style user interface requires a user to go through the Settings selection to Boot (the center item of the Settings menu), and bring up a list that can be rearranged using the keyboard’s plus and minus keys. You can see that sequence in the series of screens below...
The firmware interfaces of most other motherboards now follow a format similar to that of Asus or ASRock. In short, though, if you’re in the build stage of your PC, you can use these menus to find the boot device (these days, often a flash drive with the Windows 10/11, or other OS, installer on it) and have the BIOS detect that first to start the Windows install process. Or, if you’re after that point in your PC build or upgrade, you can yank the install key and use this menu to point to your intended final boot drive, if the system isn’t auto-detecting it for whatever reason.
Once you have selected which drive the BIOS should look to first for your boot environment, make sure to “Save and Exit” to lock in the selection. In many BIOSes, this function is reached by the shortcut key F10.
2. How to Tweak Boot Disk Transfer Modes in Your BIOS/UEFI
The BIOS defaults of most motherboards are optimized to automatically detect the operating system of most recent drives, even if they’re classic Serial ATA (SATA) drives. But older operating systems used older transfer modes such as IDE (remember IDE?), and some users will want to use the built-in RAID capability of their boards. Thus, they need to know where to access disk transfer modes in the BIOS.
While we won’t delve into the complexities of creating a RAID array here, instructions for entering and using the RAID configuration menu are provided with the user manuals of RAID-capable motherboards. But if you have an older system that requires a tweak to the Disk Transfer Mode in the course of the build, or when you’ve installed a different kind of drive, you’ll want to know where to change modes.
Getting to the drive interface settings usually requires the firmware’s Advanced interface, and that can be found under the Advanced tab’s SATA submenu (for Asus), the Advanced tab’s Storage Configuration submenu (for ASRock), and the Settings tab’s Integrated Peripherals submenu (for MSI motherboards). You can see these examples in the screen series below...
Under these "SATA mode" selections, modes may include AHCI to enable modern SATA features, IDE to support legacy modes without AHCI, and RAID.
The correct mode for most SATA system drives is AHCI, particularly if they’re hosting a modern operating system. If you’re running an ancient internal optical drive, ATAPI was an IDE standard for optical drives.
3. How to Update the BIOS/UEFI Firmware
While some high-end motherboards include an application-specific integrated circuit (ASIC) to enable BIOS updates without the installation of compatible hardware, most require a system to be booted before the reprogramming of its firmware ROM(s). While completing this task formerly required placing the new firmware on bootable media, all major manufacturers now include an integrated firmware flashing tool that’s selectable from a bootable PC.
Why would you want to update the firmware on a functioning PC? Reasons include (but are not limited to) expanding support for high-performance memory that was, perhaps, not yet available when the motherboard was manufactured. You also might need to update the firmware prior to a CPU upgrade, if the existing version of the firmware predates the new chip you intend to install.
Rather than using the Delete key to enter your BIOS, ASRock users can tap the F6 function key to enter its Instant Flash interface, and MSI users can try to reach the Ctrl-F5 key combo at the appropriate moment. Both of these shortcuts you’d engage during system startup, when you’d ordinarily try to get into the BIOS.
You can, of course, also execute a BIOS upgrade from within many BIOSes. ASRock and MSI also provide Instant Flash and M-Flash buttons within their firmware’s EZ user interface, as seen in the screenshots of our Boot Order section at the top of this article. For those who are driven enough to use Advanced mode, Asus and ASRock place this function within their “Tool” menus, and MSI provides an M-Flash key directly on its left side buttons. You can see examples of all three here...
ASRock’s firmware automatically scans connected drives and finds the new firmware ROM without requiring any additional menu. Asus and MSI, meanwhile, exit the firmware GUI and take you to a custom BIOS-flashing GUI that requires you to key down to select a drive, and over-then-down to select a specific BIOS update file you’ve downloaded. In these utilities, you'll see menus like the ones below to navigate to the update file you have downloaded...
Recommended by Our Editors
DDR5 vs. DDR4: How Much Performance Will You Gain From Today's Newest RAM?What Is DDR5? Everything You Need to Know About the Latest PC Memory StandardHow to Choose the Right RAM for Your Desktop or Laptop PC in 2021However you execute your BIOS update, take a methodical approach and back up any critical data on your PC in advance. BIOS updates are generally safe, but you want to take precautions; things can go wrong if there’s a power outage or other glitch during the update process. As always, never interrupt your PC while it’s performing a BIOS update; be patient.
4. How to Set Up an XMP Profile in Your BIOS/UEFI
Extreme Memory Profile (XMP) settings aren’t just easy things to configure, but they are necessary to reach the advertised performance levels of all but the most basic memory kits. Little more than an extended configuration table embedded on a memory module’s tiny flash ROM, XMP enables custom data rates and latency (timing) settings to improve response time, along with any extra voltage needed to make the memory stable at these higher frequency and lower latency values. (See more in our primer on how to pick the right memory for your PC.)
DDR4 memory (or older DDR3, for that matter) pegged to an XMP profile in the BIOS will operate at a speed higher than its base frequencies. (Also, see more about spanking-new DDR5 vs. DDR4 here.) Think of XMP as a quick overclocking method for memory, without the need for tweaking and test-driving individual memory specs and characteristics to see if they work stably.
If your system is already up and running, and you’re bopping around in Windows, you can call up Task Manager (hit Ctrl-Alt-Del, click Task Manager) and check for the current RAM speed at which the system is running. In the Task Manager window, go to More Details > Performance tab > Memory and consult the Speed field.
Important to note: XMP is an Intel technology, and most AMD motherboards use XMP as a baseline while applying slight timing modifications to enhance stability when an AMD processor is in play. As such, on AMD-based boards, Asus changes the setting’s name from XMP to D.O.C.P., while MSI changes it to A-XMP. It’s the same idea—amping up your RAM to ideal performance levels agreed upon by your memory modules and the motherboard.
Regardless of whether it’s renamed on certain AMD motherboards, the XMP setting is available from the motherboard firmware’s EZ interface, as seen on the center left of the Asus and ASRock screens, and the top left of MSI’s GUI, as shown in the screenshot sequence below...
Using the firmware’s Advanced interface is also an option, and there, XMP is found within the overclocking menus of most manufacturers’ BIOSes. Asus makes users who choose to set XMP modes here use it as an overclocking baseline under the Ai Tweaker tab at the Ai Overclock Tuner option.
ASRock’s Advanced GUI, meanwhile, hides it behind the DRAM Configuration submenu of its OC Tweaker tab...
And MSI places it within the OC menu of Advanced mode, but also leaves the top bar A-XMP setting of its EZ mode exposed while you are in Advanced mode...
All this to illustrate: You’ll want to keep all these names in mind as you hunt, in the event you have a different board/platform mixture than the three we cited here.
Once you get to the setting, you should see the option to disable XMP, or the choice of one profile (most probable) or a few profiles (possible, with higher-speed modules). Choose the profile, or one of the profiles, and leave the BIOS to return to Windows. On the main page of the BIOS, depending on the BIOS design, you may already see the new memory setting applied in a memory speed readout. Either way, choose to “Save and Exit” the BIOS, and see how things fare in Windows. You can also recheck the memory speed in Task Manager to see if the XMP setting held.
In short, whatever the actual overarching memory mode is called, you’ll want to look for an XMP speed setting in common between your memory (according to what modes the memory maker says its modules support) and your motherboard (which will be outlined in its specs or manual). There may be only one or two profiles in common. And if so, that’s fine, and much better than settling for stock speed. Setting the system on one XMP level supported by both, then working your way up the scale, if you have multiple options, until system operations are no longer stable, is a quick-and-dirty way to optimize your memory performance in the BIOS.
Like What You're Reading?
Sign up for Tips & Tricks newsletter for expert advice to get the most out of your technology.
This newsletter may contain advertising, deals, or affiliate links. Subscribing to a newsletter indicates your consent to our Terms of Use and Privacy Policy. You may unsubscribe from the newsletters at any time.
Thanks for signing up!Your subscription has been confirmed. Keep an eye on your inbox!
Sign up for other newsletters}})
George Washington
Lorem ipsum dolor sit amet, consectetur adipisicing elit. Ducimus itaque, autem necessitatibus voluptate quod mollitia delectus aut, sunt placeat nam vero culpa sapiente consectetur similique, inventore eos fugit cupiditate numquam!